Ming Consort tombs -Tomb 4
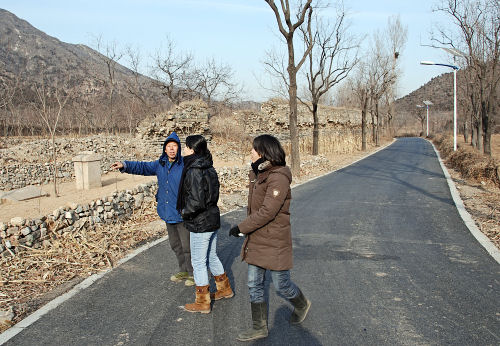
County road skirting the front perimeter wall
-Remnants of the wall behind the trees in the center-
Persimmon
Ming consort tomb #4 has been incorporated into a persimmon orchard.
Its location directly adjacent to the local county road, which skirts many of the western consort mausoleums, makes it fairly easy to locate.
The county road (#9 on the blueprint below) runs along the mountain ridge against which many of the the consort tombs have been placed.
To make matters even easier, the road curves around and runs parallel to the well preserved front wall of tomb #4. The photo above right shows the county road and perimeter wall.
Tomb occupants will be revealed at the end of this page.
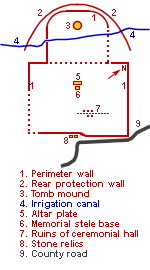
Blueprint
Stone pieces from the
original front gate
The tomb has two main sections; the rectangular, lower part, which originally contained the ceremonial hall (#7), and the almost square top part, which contains the tomb mound (#3).
A perimeter wall (#1) enclosed the entire mausoleum and an additional, curved wall (#2) erected behind the rear part of the outer wall offered additional protection.
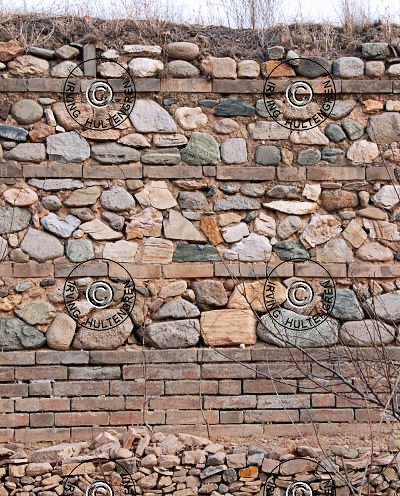
Beautifully layered wall construction of tomb #4
The top corners of the rear perimeter wall are rounded, almost forming quarter circles.
An irrigation canal (#4) runs the length of the entire mountain ridge and has unceremoniously been cut through all the consort mausoleums on its way, including consort tomb #4.
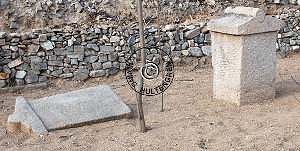
The front section contains the base of the memorial stele (#6), but the stele itself is missing. The section also once contained a sacrificial altar, but by now only the top slate remains (#5).
The original front gate is completely gone and only a couple of stone pieces (#8) from the gate remain on the ground.
Perimeter wall
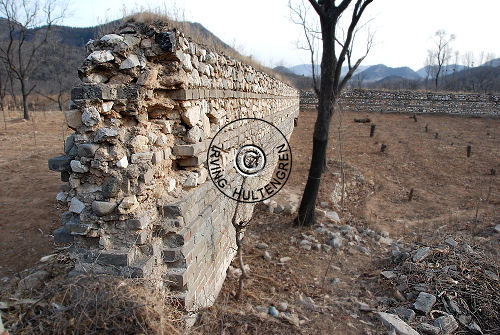
This 2.5 - 3 meter tall wall is particularly beautifully decorated. Rather than the traditional outer layer of large Ming era brick covered with a vermilion colored plaster, the wall of tomb #4 consists of horizontally stacked layers of different brick and stone.
The ground layer is a standard base of partially alternating rectangular brick. It ensures a steady base for the remaining wall.
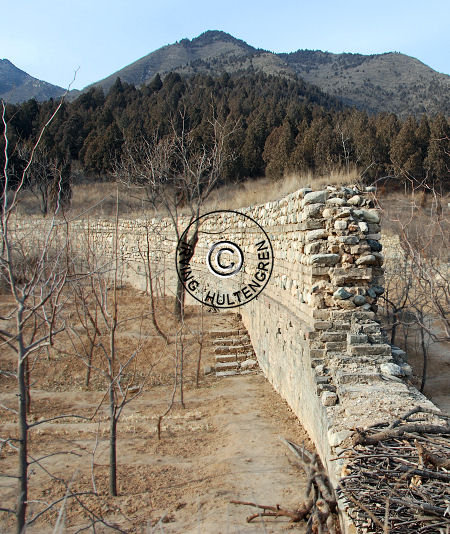
Rounded rear wall section -also note the steps
On top of the base layer are three layers of different types of natural stones placed so that they form an almost smooth, flat surface. Each of the three layers are separated with a row of standard brick.
On top is another small section of stone, which in turn was capped with colored, glazed tiles -now all gone and replaced by wild growing grass.
Large sections of the perimeter wall are still extant and certainly enough sections to render a fairly good impression of what the mausoleum looked like right after it was built.
Notably, the rear section of the perimeter wall with curved corners nicely envelopes the tomb mound -the most essential part of the mausoleum.
The height of the original wall varies. In some parts it is about 2.5 metres tall and in other parts it is almost 3.5 metres, all depending upon the ground surface. The three top sections are always identical and height variations are leveled by varying the height of the base, brick structure.
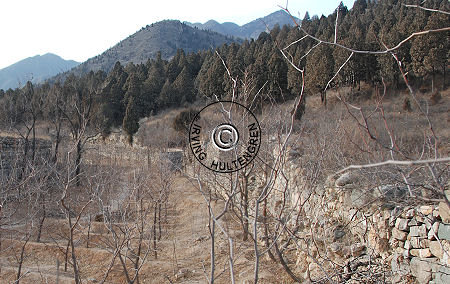
Protective wall (from right) -perimeter wall left center
Steps have been built alongside the inside of the wall in sections with greater height variations.
Protection wall
An additional, protective wall was erected around the back of the rear perimeter wall.
This wall was not as beautifully decorated as the perimeter wall proper, but it was still a sturdy backdrop, which solved its purpose of simple protection.
Farmers, bound on maximizing yield, have even used the space between the two wall sections to grow crops. Small "walls" made of soil ensure an efficient irrigation by dividing up the space in a number of smaller sections, easier to control.
Plinths and ceremonial hall
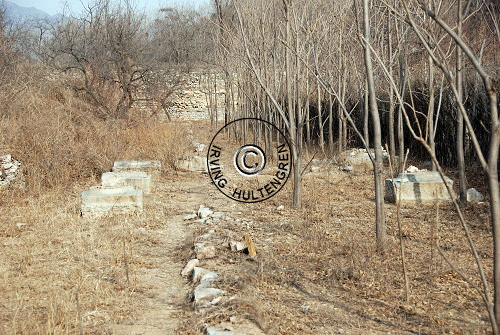
Plinths, tile pieces and a row of stones
-all part of the ceremonial hall
Little remains of the ceremonial hall, where friends and family would honor the deceased on certain occasions during the year.
In fact, so little remains that it is hard to assess where the hall was originally built.
Some 7-8 plinths are still placed where the front of the hall presumably was erected.
There are still plenty of colored, glazed til pieces on the ground to validate that a roofed building once stood here. The pieces are all colored in black, imperial yellow or -green, the last two colors exclusively reserved for use in structures made for the imperial family or near relatives.
There is nothing else left of the hall or halls, so it is impossible to establish the size of the building(s).
Stone plinths, the supporting foundation for the wooden beams, which carried the roof structure, can be found both left and right of the mausoleum center line indicating the possibility of the tomb originally having two separate structures.
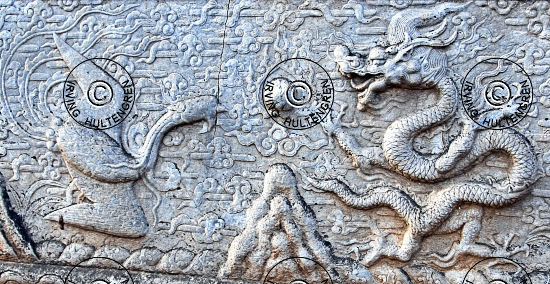
The phoenix and dragon in playful flight, fighting over the pearl
The memorial stele and sacrificial altar
Contrary to most of the other consort mausoleums, there is no memorial stele to be found in this consort tomb #4.
But that doesn't mean that there wasn't one to begin with. Virtually all Ming mausoleums would contain a memorial stele, be the mausoleum for a prince, princess, general, concubine, Empress or Emperor.
Whereas the stele itself is gone, the base of the original stele is still extant and can be found close to the center of the mausoleum area.
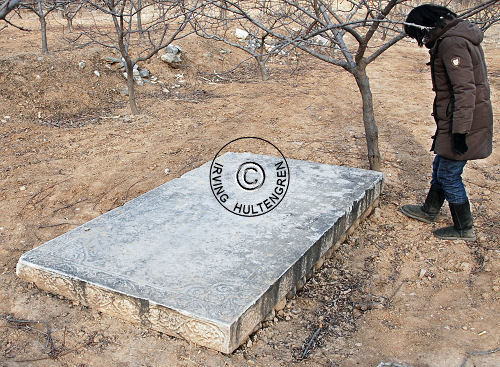
The top plate of the sacrificial altar
Decorations on all four sides are still in good condition. The front- and back sides have a dragon and phoenix in playful flight, fighting over a pearl hovering over a mountain. A phoenix decorates one of the end pieces and a dragon the other.
This consort tomb has also originally been equipped with a sacrificial altar.
The altar base has been removed, but the altar top slate still lies a few metres behind the memorial stele base on a small elevation.
The altar slate has traditional symmetric decorations chiseled into the sides and the top.
Tomb mound
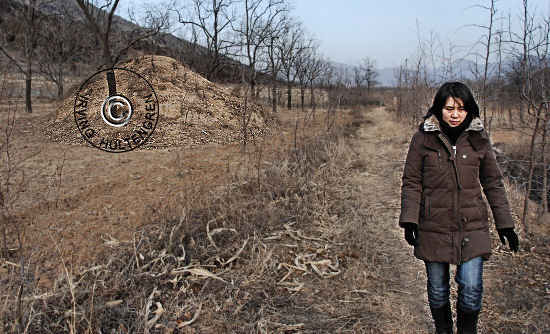
Tomb mound
The burial area proper remains in good condition, when one disregards the fact that a modern, small irrigation canal has been cut right through this sacred location.
The tomb mound is still an impressive 2 metres tall and has retained its round shape through the tides of time.
Occupants?
The inclusion of a dragon, the symbol of the Emperor, on the stele base is significant. Steles in most consort tombs would only have phoenix birds as decoration, so the appearance of the dragon indicate a highly honored female occupant.
Perimeter walls
Just how important the dual symbols of dragon and phoenix is, can be exemplified in the later Qing dynasty (1644-1911). These two symbols together can for instance be found prominently in the magnificent mausoleum of the last female ruler of China, Empress Cixi, who effectively ruled China from "behind the curtain" for almost 50 years in the second half of the 19th century.
Consort tomb #4 has all of four occupants, all concubines of the Wanli emperor. They are Lady Zheng, Lady Li, Lady Liu and Lady Zhou.
Lady Li (died 1597), was honored as Imperial Noble Consort Gongshun, the highest rank just below Empress.
Lady Liu (1557–1642), was honored as Consort Xuanyizhao, three levels below Empress. Same rank was bestowed to Lady Zhou, honored as Consort Duan.
Lady Zheng (1567–1630) is a little more interesting. She was the Wanli emperor's favorite concubine and gave birth to two sons, Zhu Changxun and Zhu Changzhi, none of whom ascended the throne.
The Wanli emperor repeatedly attempted in vain to promote Lady Zheng to Empress and to declare one of their sons as crown prince.
However, in 1644, after the fall of the Ming dynasty and 14 years after she had passed away, Lady Zheng was finally promoted posthumously to Empress by the Southern Ming dynasty. This became possible because she was the grandmother of the Hongguang Emperor, the first ruler of the Southern Ming Dynasty and the son of Zhu Changxun.
And this whole story as well as the Wanli emperor's infatuation with Lady Zheng may well explain why the stele base includes a dragon motif at the base.